Saturday, July 16, 2011

Bartleys Tri (Triathlon for Beginners: Part 6)

Ahh, busted! I've definitely been dragging my feet on Part 6 of the "How to Do a Triathlon" series. Getting slammed at work, traveling, weekend conferences, and just pooped all around. Woe is me...yeah yeah, you get it.

Bartleys Tri, Parts 1-5 have been all about the details and basics of triathlon. If you read through the entire series, you'll know what to expect in your first triathlon. Since I'm still a beginner and figuring things out as I go, I'm documenting it all for you newbies who are in the same boat and wanting to know exactly what to do and how to do it in your first tri.

Have you seen my earlier posts?
A recap:
Part 1 covers triathlon distances and race day setting up. 
Part 2 is about what to bring on race day, and the little accessories that make the race a comfortable one.
Part 3 is a what-to-wear guide.
Part 4 describes the beginning of the race and the swim event.
Part 5 is all about the first transition and the bike portion.


Transition 2
Welcome to the end of the bike ride. As you approach the end of the bike course, heed my warning about the dismount line, described in Part 5! No need to get this far only to meet up with a penalty or DQ (disqualification). The best advice I can tell you about finishing the ride and getting to the transition is that you should make sure you slow down and are off of your bike before you hit the dismount line. Also, do not take off your helmet until you're off of your bike. Don't even think about unclipping the chin strap! Once off the bike, continue as you did when you got on the bike; unclip from your pedals and run over to your transition area, or pull your feet out of your shoes (somehow) and run barefoot. Either way, be careful. Your legs will feel a little unstable when you hop off!

Am I running yet? I can't feel my legs!
By the end of the ride, you're probably going to feel a little tired. Never fear: you're almost there! In fact, you're 66% done! Again, consider downing an energy gel or having a few splashes of a sports drink. Aim to eat/drink something for an energy boost every 45 minutes. The transition is a good time to do this, but if you feel comfortable with eating on the run, carry it with you and worry about it once you're on your feet.

Here's how I recommend managing the bike-to-run transition:

  1. Run with your bike over to your transition area.
  2. Hang the bike on the rack to free your hands. (See Part 1 for the illustration of how to hang the bike quickly by the seat.)
  3. Kick off your bike shoes, making sure they stay in your area.
  4. Slide into running shoes.
  5. Run out of the transition area, and out to the run course! There are no speed limits or mount/dismount lines like in the ride portion, but you might see a corral or a lane to divide/separate incoming bike traffic from outgoing runner traffic.
  6. Run your butt off!
Optional steps during T2:
  • Change to a dry shirt. If you sweat a lot, you might benefit and feel better in a dry shirt to start your run.
  • Put on Garmin/watch
  • Eat/drink something. You might be hungry by this time, so not a bad idea to have a Clif bar or some kind of solid, easily-digestible food on-hand. (Make sure you have water to wash it down.)
Compared to T1, there's not a lot of preparation needed for the run. To make your transition a little faster, you can use gear bib number belts or speed laces. A bib number belt, as described in Part 2, is basically a clip-on belt to which you attach your race number. Speed laces may also save you the time your would normally spend fussing with shoelaces - just pull and go. Motor skills are sometimes questionable at this point anyway, right?


Run Survival Guide

You'll have to forgive me on this run discussion. I've been around the running scene long enough now that I forget what it's like to be a beginner and not have the experience, so I'm going to lean on you guys to ask questions for the things I'm leaving out and take for granted. [Trust me, there may be a lot!] Seasoned pros, your advice is welcome, so leave a comment!

  • It's normal to feel a little unstable. That wobbly-leg feeling will go away after a few minutes. (You can lessen the effects of "bike legs" by running for a few minutes after you ride your bike during training. Eventually, you'll barely notice the wonky legs. Triathletes call this workout a "brick," when you ride and then run. I don't think I need to explain the word choice - do it once and you'll understand!)
  • Right off of the bike, you're moving faster than you think. Trust me - you will feel like you are crawling along, but you'll surprise yourself.
  • I said it twice and I'll say it again: pace yourself! Don't feel like you need to compensate for a slow pace when you start the run... no matter who you are, you're moving along pretty quickly! Take it easy when you first start off. If you feel good toward the end of the run, go for it, but the beginning of the run is not the right time. Moral of the story: save something for the end of the race when you'll really need it.
  • The course should be marked with either directional signs (like realtor/campaign signs), course marshals at the turns, or with spray paint on the road. If you're going to be way ahead or way behind with no one in sight to follow/lead you, study the course ahead of time so you know where to go.
  • Photographers. Since the run portion could be the best event to capture a photo of you, smile and wave at event photographers! Most people aren't looking too great or recognizable on the swim and run with all the stuff on their heads.
  • Water stops/aid stations. Water stops will consist of tables set up with Dixie cups of water, and sometimes Gatorade or sports drink (and longer races may distribute energy gels). There might be volunteers holding out cups for you, and for a larger race, there may be tables on both sides of the course. After you finish drinking, there will be trash cans, but 90% of people throw it on the road, since volunteers usually clean it up afterwards. This might be the only time you can "litter" during a tri and not get penalized, but if you can hit the trash can, hats off to you! Also a good time to crack open an energy gel so you don't have to carry it with you to the next aid station to throw away.
Holy Dixie cups, Batman! A little extreme.
  • Water stop cautions: look around and be aware of your surroundings and nearby runners when/if you stop or slow, so you're not cutting someone off or getting in their way. It's ok to walk through a water stop, but try to grab a cup of water and get out of the way if faster people are coming by. 
    • If you stop or slow down significantly, walk through the center of the water station area (if tables are on both sides of the course), since runners will be trying to grab cups from the volunteers from either side. 
    • On a one-sided water stop, if you don't plan to stop for water, take the outside of the lane farthest from the water tables to avoid mowing someone down as you fly through the aid station. If you do stop for water, stay on the inside near the tables. If you slow down significantly after taking water, get past the water tables and then slow down so that you're not creating an obstacles for water-stoppers running by.
The one-sided water stop. Via
    • There are no strict aid station rules on besides knowing what and who is around you (etiquette) and not getting in the way.
    • Sidenote: O.M.G. Speaking of etiquette, you have to read this blog post I stumbled on. The video in it shows a professional runner in the NYRR Mini 10k intentionally knocking over cups of water to force her competitors to dodge the cups or get their feet wet. Not cool! I didn't think you could play dirty with running, but if you can, this is it.
Aid station volunteers are spirited and friendly.
Thank 'em for coming out! Via
  • How to drink water without making it go up your nose: Take the cup and squeeze the top of it so you've got a little spout, and nothing can splash out. Put your mouth over the spout you made, and now you can run along and drink it slowly!
Squeeze it! Sorry about the plastic cup...
best I could find around the house!
  • Once you get to the end of the run course, listen or watch for volunteers who might be directing you to a certain finish lane or finish chute near the finish line. After you cross the finish line, you can slow down and walk, but don't stop unless you absolutely need medical help-- it can create a bottleneck and affect other finishers' times if they can't get through the finish chute behind you! Safety-wise, if you've got someone barreling in behind you and you stop, you could definitely get mowed down, so keep on moving.
  • When you finish the run, keep walking to prevent your legs from seizing up or cramping. If you stop, you're at much higher risk of a cramp! Get the blood flowing and keep on moving - don't sit down.
End of the Race
Congrats! You just did it!

If you have time, stay for the awards ceremony. You might get a finisher's medal through the finish chute also. The awards ceremony usually honors the top 3 finishers in each age group and the overall finishers. It's a nice gesture to stay until the end of the awards ceremony if you are there for it...  It's a great time to celebrate and take victory photos with giant cows, like these:

What now?
Recovery is just as important as the race itself. Try to get some sports drink and/or food in your system within 30 minutes of finishing, if your stomach can handle it. The quicker you replenish and get your body some fuel, the quicker your recovery within the next few days (the less time you'll spend with sore muscles?) Look for something with a mix of carbs and protein. Good examples of recovery fuel might be: a PB&J or Ben's favorite- a big ol' hamburger. Usually the finish area food is delicious! At the Go Girl Tri in Indy, they provided Chick-Fil-A sandwiches for everyone... perfect! Take this moment and indulge in a cookie... or twelve. You need to replace the calories you just burned! (In all seriousness though, probably best to grab something that has some nutrients)

Ben's favorite recovery foods
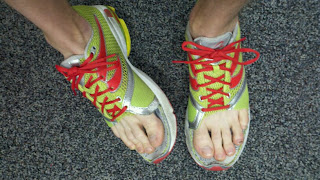
On the topic of recovery, I also like to wear compression tights. They apply compression to your legs so that the blood is flowing through those areas. I like the CWX brand stuff, but can't say I've tried others either. After a full marathon, I've noticed that wearing compression tights for the next 12 hours results in much less muscle soreness over the next days compared to when I go without. There are also plenty of other types of compression gear, like socks, shorts, etc. Since we're talking about gear, consider also switching into a fresh and dry pair of shoes or sandals, to give those feet a break. Or, you can get a custom-made pair of shandals from Ben... he made 'em himself! So do you think there's a market for these?


To give yourself the best chances for recovering, take a nap too! That tired feeling will kick in soon. :) Meanwhile, you've had a solid and packed day, and it's probably not even noon! Enjoy that awesome feeling of accomplishment. And then, sign up for your next triathlon!

-------------------------------------------------

Thanks everyone for sticking through this SIX PART series of blog posts... I hope it has been insightful, inspiring, and educational. Most of all, if I've convinced any of you to take the dive and sign up for a triathlon, then I'll consider myself successful. Thank you for all of your comments and feedback!

If you enjoyed this discussion, do me a favor and follow this blog. Or, Subscribe at the top of this page!

post signature

Monday, July 4, 2011

Bartleys Tri (Triathlon for Beginners: Part 5)


Bartleys Tri is about knowing what to expect in your first triathlon. Why? Because I had no idea when I started, only two short triathlons ago! I'm writing down everything I wish someone had described to me before my very first. As you read to the end, did I forget to explain anything? Leave a comment and I'll get you an answer! Experienced triathletes, if I left anything off, leave a comment and share what you know!

To recap:
Part 1 covers triathlon distances and race day setting up. 
Part 2 is about what to bring on race day, and the little accessories that make the race a comfortable one.
Part 3 is a what-to-wear guide.
Part 4 describes the beginning of the race and the swim event.

So we're to the point where it's time to get out of the water and transition. You ready? Let's go for it.


We left off at how best to get through the swim portion. In short, pace yourself, make sure you know where you're swimming (sight), and if you're like me and struggle with this event, wait behind and swim on the outside of turns to avoid getting kicked or smacked in the water.

First and foremost, the transition is the period of time in which you switch gear and equipment between events. So, you'll have a swim-to-bike transition and a bike-to-run transition. A transition area is the fenced-off area where only competitors are allowed during race time- this is where you store your bike, your shoes, and the rest of your gear. Vocabulary aside, moving on...!

At the end of the swim, you'll get to the point where you should be able to reach the bottom. Assuming that you have a traditional beach/shore swim, swim as far as you feel comfortable, and then run or walk your way out of the water. If you're swimming in a canal or a pool, there may be steps or volunteers to help you get out of the water if it might be tricky. Once out of the water, you're going to step on a mat or pass through the timing system, which will log the length of time for your swim. Between here and the next mat, it's tracking your transition time.
Timing mats will be placed to track each event and transition time
via RunnersEdge Race Timing
Once you're out of the water, most competitive people will run toward the transition. It's your choice: run or walk it. Ultimately, the clock is still ticking and any time you spend here will get compiled into your total time into what's usually called something like "Transition 1," or "T1," But, like I've said before, your first triathlon should be about getting comfortable and not looking for a fast time. In addition to that, you might feel a little light-headed or weak on your legs after completing the swim, so be conservative and do what you feel is best at the time.


How to find your bike
As you're running/walking by and your brain and body are already tired from swimming, it's not always easy to remember your bib number or find your rack - no joke! Marking it in a way that you can locate your stuff with two brain cells is totally genius! I definitely picked up some of these great ideas at the Go Girl in Indy.

  • Mark your spot. At first, I couldn't figure out why I was seeing weird chalk marks on the ground. Turns out, some people had brought chalk to mark arrows to their bike rack locations from the main drag. 


  • Balloons: bring and tie fun balloons to the rack to help spot your bike from far away!

Two words of caution as you're approaching the transition area:
1) Watch your step when you're walking/running.
There might be rocks, sticks, glass, or other sharp objects on the ground. I've never heard horror stories, but I do make a point to step lightly and carefully when I'm running through what's normally a parking lot.
2) Make sure your ankle strap and timing chip are still attached. 
Remember how I mentioned that my ankle strap had fallen off during the swim? Since I didn't notice, my entire race would have been completely trashed if I'd kept going at that point. Someone called over to me that they'd found it in the water later, and I spent some transition time running over to retrieve it. Whew-- that was just lucky!

In all likelihood, there shouldn't be a lot of post-swim preparation you need to do while you're getting to the transition area. But, if you're wearing a wetsuit, you'll want to start pulling that off while you're en route.


Get to your transition area and immediately prepare for the bike event. Since transitions are important in your overall time, experienced triathletes have their ritual down to a very time-efficient science, wasting no precious seconds before they're off on the next event. I'm not quite to that point, and don't mind spending a few seconds on something like putting on socks, as a more-than-worth-it trade-off to be more comfortable during my next event(s). While you might think that you'll be soaking wet and dripping from the swim, you'll be surprised to see how well the technical fabrics keep moisture away. You'll be damp, but not dripping all over the place for long (so you'll notice no step for toweling dry).

One other cool idea I saw in practice:
Sit on a bucket. I realized that people bring 5-gallon plastic buckets to tris now not just so store massive amounts of tri stuff, but to SIT ON while they're transitioning--- Amazing!!! Since your legs are wobbly from the swim, having a lil' seat like a bucket is such a good idea... Lesley also says it's a good way to lay your claim to your territory in the transition/bike rack area.
Lesley's bucket!
Here are my step-by-step directions for transitioning to the bike:

1) Put on your shirt or any other pieces of clothing you wish to wear for the ride.
2) Put on your helmet, making sure that your bike number is attached (if one was given to you). Meanwhile, ensure that your number is still attached to your bike from when you prepared it, pre-race. Sunglasses go on at this time, too.
3) Take a few steps on your towel and dry your feet as much as possible -- get all the gravel or rocks off so they don't make it into your socks or shoes.
4) (Optional) Put on socks. I usually do because it beats having blisters slow me down later.
5) Put on bike shoes.
6) Grab the bike off of the rack.
7) Walk/jog with the bike over to the end of the transition area
8) Get on, and ride your heart out!

A few don't-miss details about the transition:
  • Very Important: DO NOT get on your bike until you are in the mount and dismount area! You are NOT allowed to ride your bike until this line. The mount/dismount zone is a box or line that's usually marked on the ground, and there will be orange cones and  volunteers or course marshals around here, too. Their job is to watch for bikes and make sure everyone is safe and not going to get hit by a bike, but they can also identify you for penalties if you break any of the mount/dismount rules. It's all for safety, but be careful. Basically, if you are beginning the bike, you cannot get on your bike until after you've crossed the mount line. If you're are finishing the bike event, you must be off of your bike before you cross the dismount line.
Examples:
Get on your bike AFTER this mount line.
Classy: the words underneath say "That's what she said"
via RunningWhit

Get off of your bike BEFORE this dismount line.
via Theathleteslawyer

  • You will not be permitted to get on your bike without a helmet. Also, your helmet chin straps must be fastened. Never, ever, ever - ever - unbuckle that chin strap until you are off of your bike. Since course safety is critical, the penalty for this is disqualification. Check out the list of the commonly violated rules and their penalties for more.
  • Your bike bar ends have to be plugged. At the Go Girl tri in Indy, they checked each and every bike as people were checking in and heading to the transition area, disallowing unplugged bar ends. Safety, again; if your ends aren't plugged, you could crash and be impaled or hurt more severely than when plugged. Not sure what a bar end is? It's the cap that closes off the tube that creates your handlebars.

  • Like I said, there are some heavily debated methods for preparing bike shoes. Some people prefer to clip their shoes directly onto the bike and run barefoot (bare-socked?) to the end of the transition zone, then put their feet in and velcro up while they're riding. I don't recommend this for beginners, or maybe even for more advanced athletes; it might save you a couple of seconds, but you might risk falling off of your bike while trying to get your feet into the shoes while you're in motion. Not worth it! (Unless you feel really comfortable on your bike!)
  • I run in my bike shoes all the way to the end of the transition area. I do risk damaging my clips while doing this, so I step very carefully. I have never seen anybody bring their shoes over to the end of the transition area. There may be rules against doing this... it just doesn't happen. In polling Ben on the topic, he puts his shoes on, then jogs over to the end of the transition area too.
  • In a triathlon bag, it is important to keep sunblock and apply it often, especially if you'll be outside and racing for a while. During this transition would be a good time to apply or re-apply. It doesn't have to be an all-over, but stick to spots you don't want to pay for later (like your face).
  • When you get to the end of the transition area on or near the dismount line, you'll walk over another mat. That time will end your Transition 1, and your bike time officially starts now.
Triathlon Bike Survival Guide
Some general comments about the bike portion of the triathlon... I will admit that I'm still very very new to cycling, so I'm going to lean on comments from the experienced riders I know. Ladies and gents, please leave a comment if you've got any good tips!
  • As always, pace yourself. It's easy to get carried away and "kill it" in the first miles, but even in a sprint triathlon, you've got at least 10 miles to go after you get over the initial adrenaline of starting a new event.
  • Try starting your bike in a lower gear, or in the small rings, when you first get on the bike. It'll be easier to get the pedals moving once you're mounted and will give you a chance to warm up to moving new muscles for this event without overstraining in the big rings from the very beginning.
  • Aid stations for longer races (there usually aren't any in Sprints, as far as I've observed) will offer you - at the very least - water, in bottles. Volunteers should be holding them out for you, so grab and go... and don't hit anyone on your way out. :)
  • Be very careful about your following distance! Drafting is the act of following somebody so closely so that they're cutting the wind for you, resulting in you having to do less work. USAT (USA Triathlon), the governing body for triathlons, has strict rules against drafting.  To avoid penalties:
    • You must keep at least 3 bike lengths from the rider in front of you.
    • If you pass a rider, you must pass within 15 seconds... this is the only time you're allowed within that drafting "box."
    • Ride on the right-hand side of the lane, passing on the left.
    • No blocking!
    • You can't pass someone back unless you've left their draft zone (3 bike lengths behind them) first.
  • If you get a flat or have bike trouble - and I hope you don't - only you are allowed to fix it. There are three options:
    • If you choose not to fix it, then you'll be considered disqualified or DNF (did not finish) and out of the race. You can catch a ride in the tail vehicle which picks up people having trouble or medical issues.
    • In longer or larger races, there might be bike mechanics that drive around in vehicles and will help you fix your bike. This is legal, but some races don't have them, and for ones that do, you might be waiting a while before they reach you. I've never been in a race that had them, so I'm guessing they're pretty rare in short sprint races. 
    • You can ride to an aid station, where they will have supplies to fix your bike. Again, I fortunately don't have experience with this, but in a sprint, there may not be intermediate aid stations on such a short ride.
  • Do not throw your trash on the ground! It's another grounds for a time penalty. (I've seen course marshals specifically watch for stuff like this) Tuck it in your shirt, shorts, pocket, or in a bike pouch... just take it with you!
The Bartley cocktail bar - pick your poison.
  • At this point, your body is starting to become depleted of electrolytes, water, and carbohydrate stores. Best advice for you -- practice using the products shown above/described below and do trial runs before you use these on race day!
    • Electrolytes: Consider gatorade, salt pills, electrolyte pills, Sport beans (Jelly Belly jellybeans with a salty taste). There are obviously many many options, so try them out. Electrolytes  I prefer electrolyte pills because I can pop them and it's done. Gatorade just makes my stomach extremely upset... wish I'd learned this insightful lesson not during a race. Shown below: Hammer Endurolytes electrolyte pills, and Nuun (think Alka-Seltzer fizzy drink tabs).
    • Water: Make sure you drink water - but not too fast - when you pass aid stations, or carry water in bottles on your bike. Practice this beforehand to avoid oversteering or losing control of your bike during the event (unfortunately, a skill I haven't learned yet). 
    • Carbohydrates: I recommend downing a Gu, Hammer Gel, or some kind of energy gel to keep your energy levels up. If you're not familiar with energy gels, they're basically little packets of easily-digestible sugars/carbs that are absorbed into your bloodstream and will give you an energy boost. (As a result, they taste as sweet as maple syrup times ten) Highly recommend! I don't participate in any hour+ long events without at least one. Expect to take one every 45 minutes. In the red box above, top - a gel bottle (you can buy gel in massive quantities as opposed to little packets) which fits into a hydration pack or a bike jersey pocket. Bottom row, R to L: Accel Gel, Hammer Gel, Clif Shot.
    • The Magic Elixir: You might be able to kill all three birds with one stone by downing a sport drink like Endurox, Perpetuem, Accelerade, or Infinit (my friend Rick's favorite). They're powders that you add to water, designed with a carbohydrate/protein mix and a cocktail of other nutrients to help you restore, recover, and continue on. While Accelerade lemonade flavor tastes the "best," you're not going to mistake it for a Smirnoff Ice. Or any good-tasting drink for that matter! Blue box above: Accelerade Hydro Lemonade and Perpetuem (Vanilla Orange - eww)
    • You can get all of these nutritional items I just mentioned at your local running store. Brand and taste is personal preference, but make sure you practice with them while you're doing your long workouts to lower your chances of GI issues. 
That pretty much sums it up for the bike transition and the bike! See you next time for the final chapter, Bartleys Tri: Part 6 - T2 & Run.

Want to review?

Part 1 - Signing up and Setting up
Part 2 - Equipment & Gear
Part 3 - What to Wear
Part 4 - Start & Swim
Part 5 - Transition 1 & Bike
Part 6 - Transition 2 & Run
Related Posts Plugin for WordPress, Blogger...